
Connect your Mac using OWC Jellyfish Connect
A step-by-step guide for using the OWC Jellyfish Connect app (macOS) to get up and running with your OWC Jellyfish.
- Follow the instructions in our setup guide in order to establish the physical connection between your OWC Jellyfish and your Mac at www.owc.com/support/jellyfish/setup
- If you haven't downloaded and installed OWC Jellyfish Connect for macOS yet, please go ahead and do so from here.
- When you launch the application, it will show up in the menu bar of your Mac. When you click on it, you’ll see OWC Jellyfish Connect 3 has a slightly different setup than the previous version.
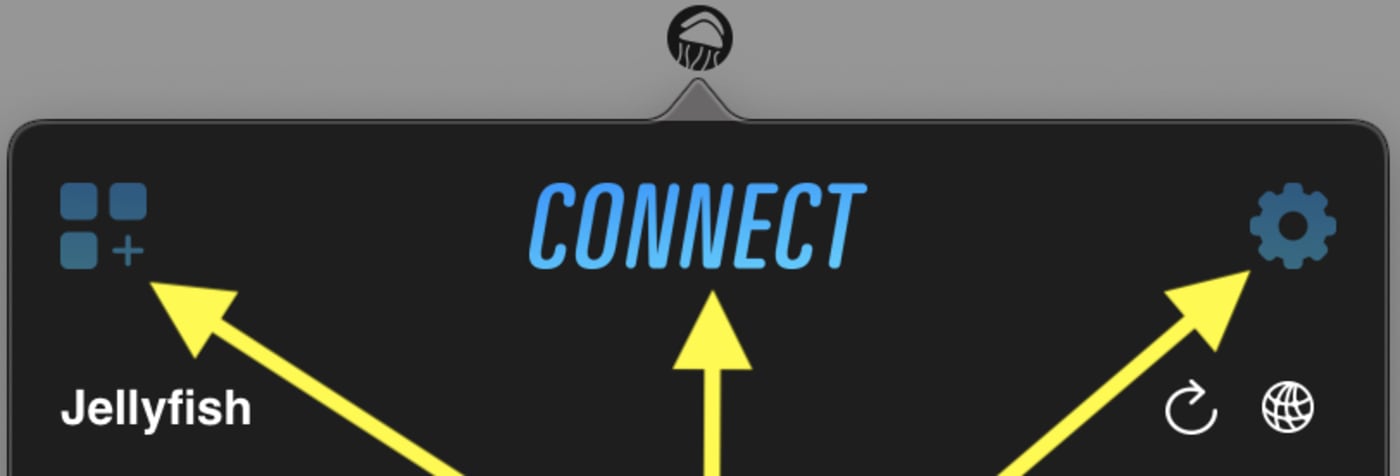
- OWC Jellyfish Connect has three main buttons at the top. From left to right, they are Apps, Connections, and Settings.
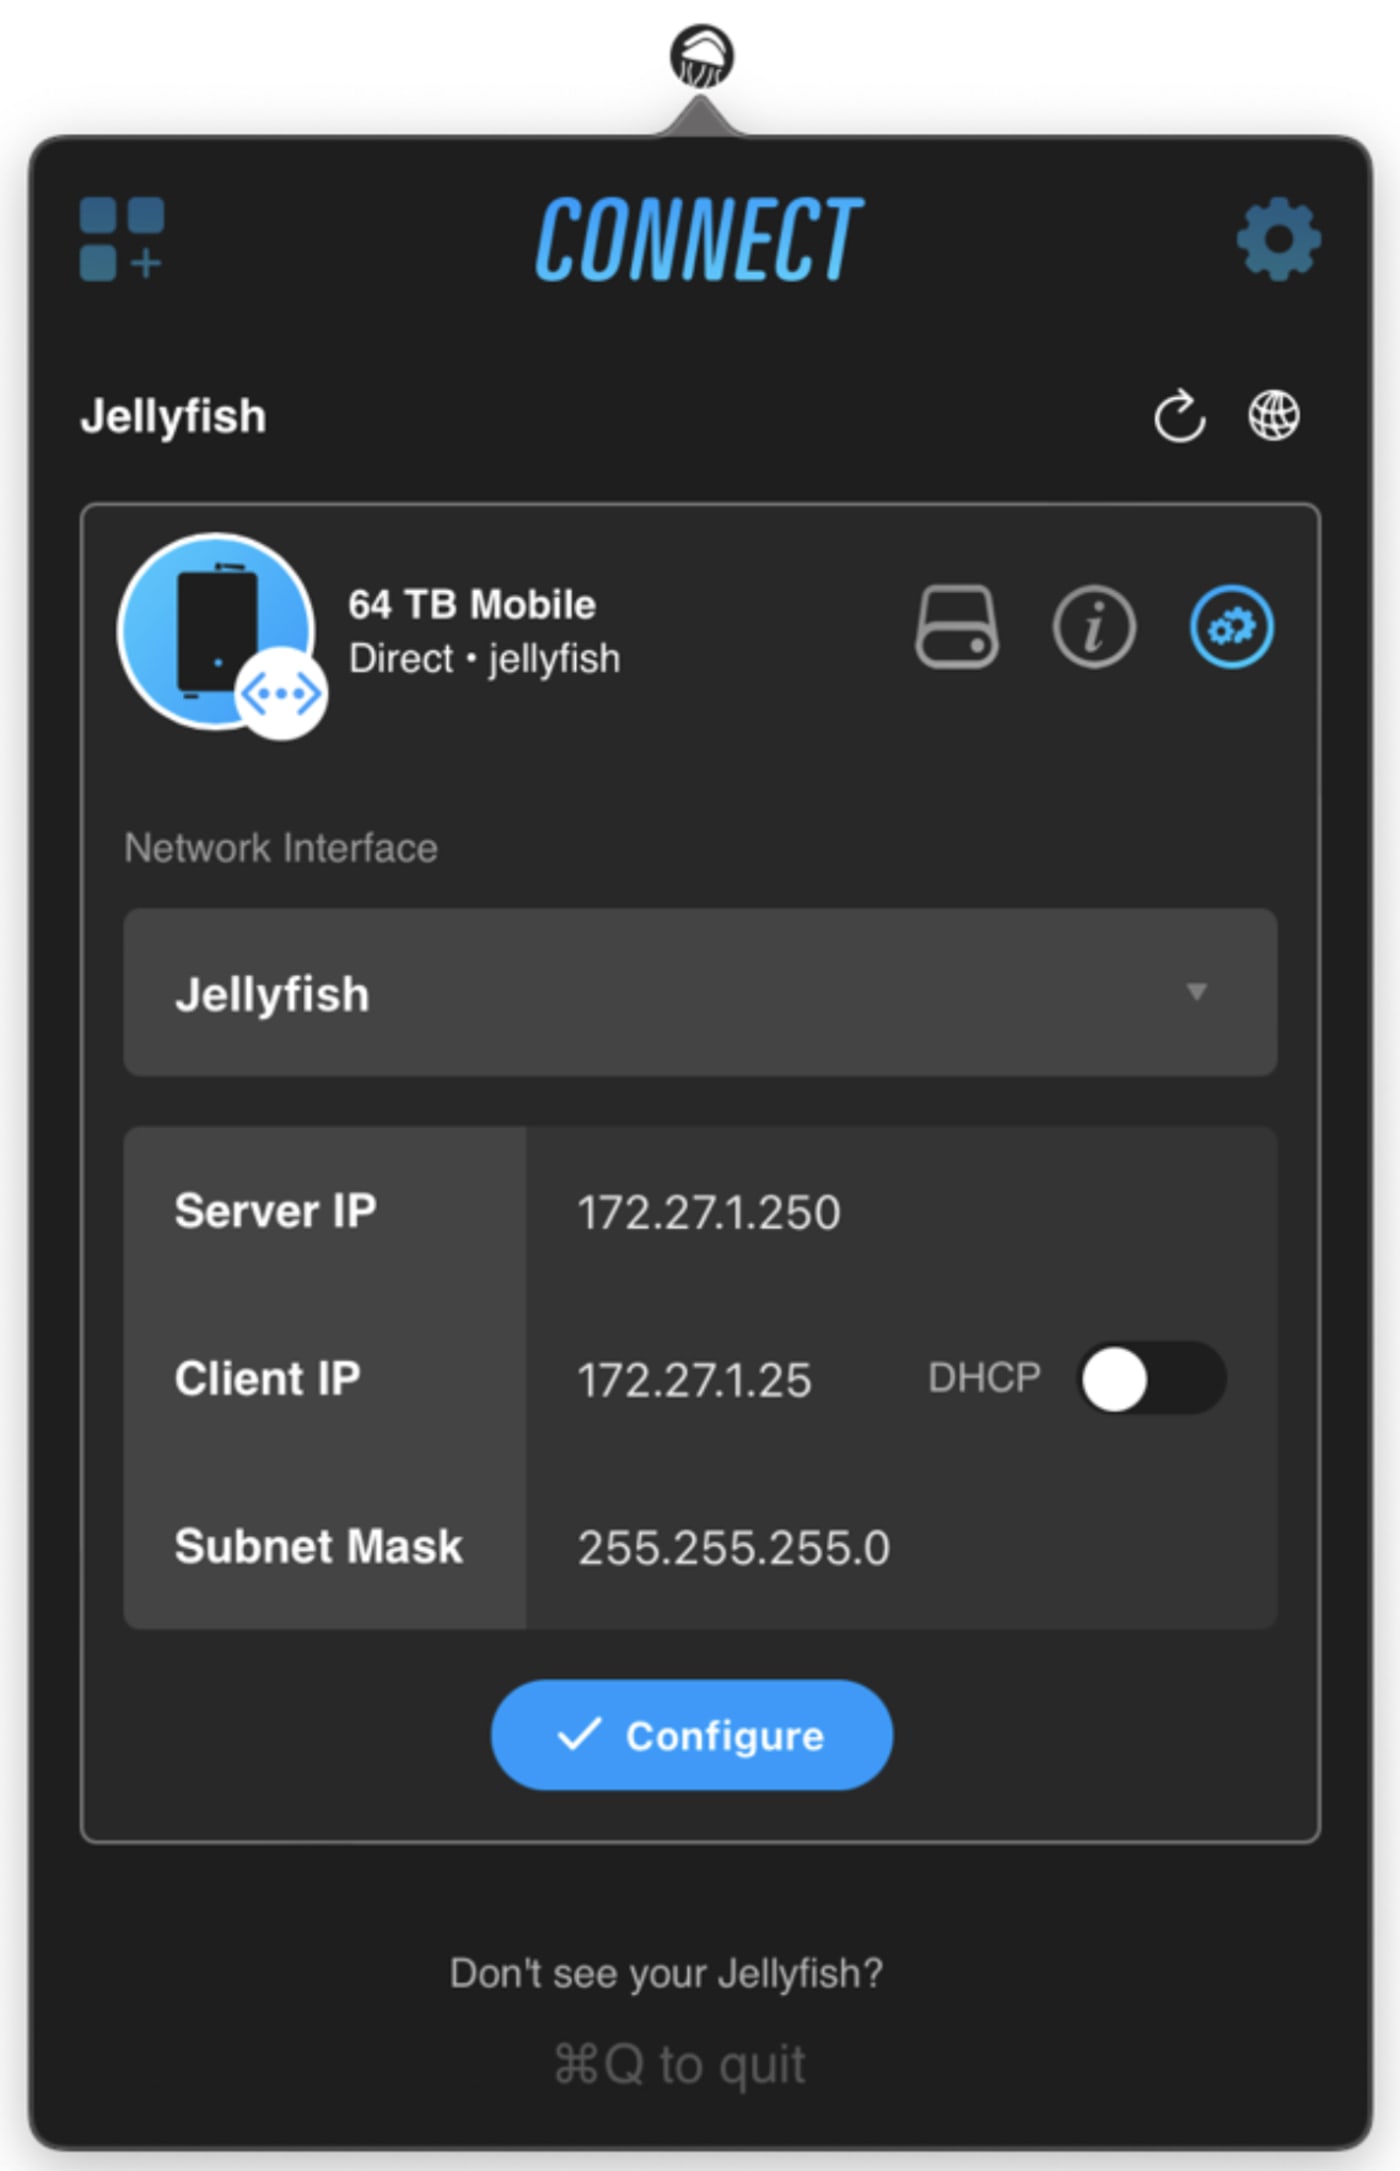
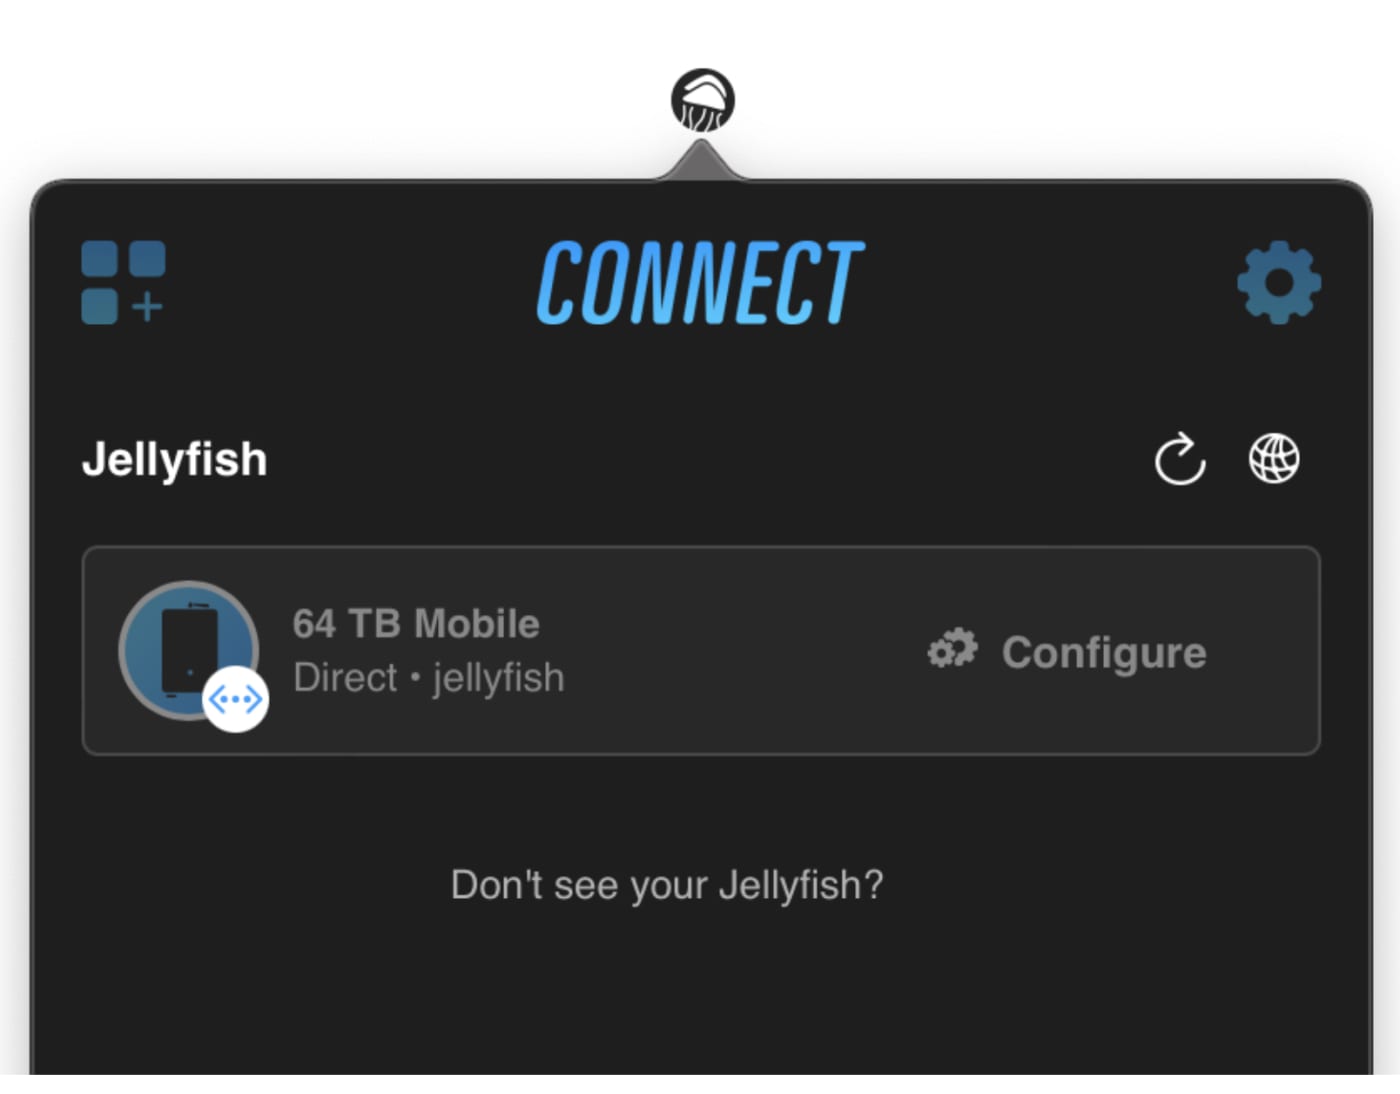
Click on “Connect” to configure your OWC Jellyfish. This will show a list of Jellyfish connections available, whether configured or not.
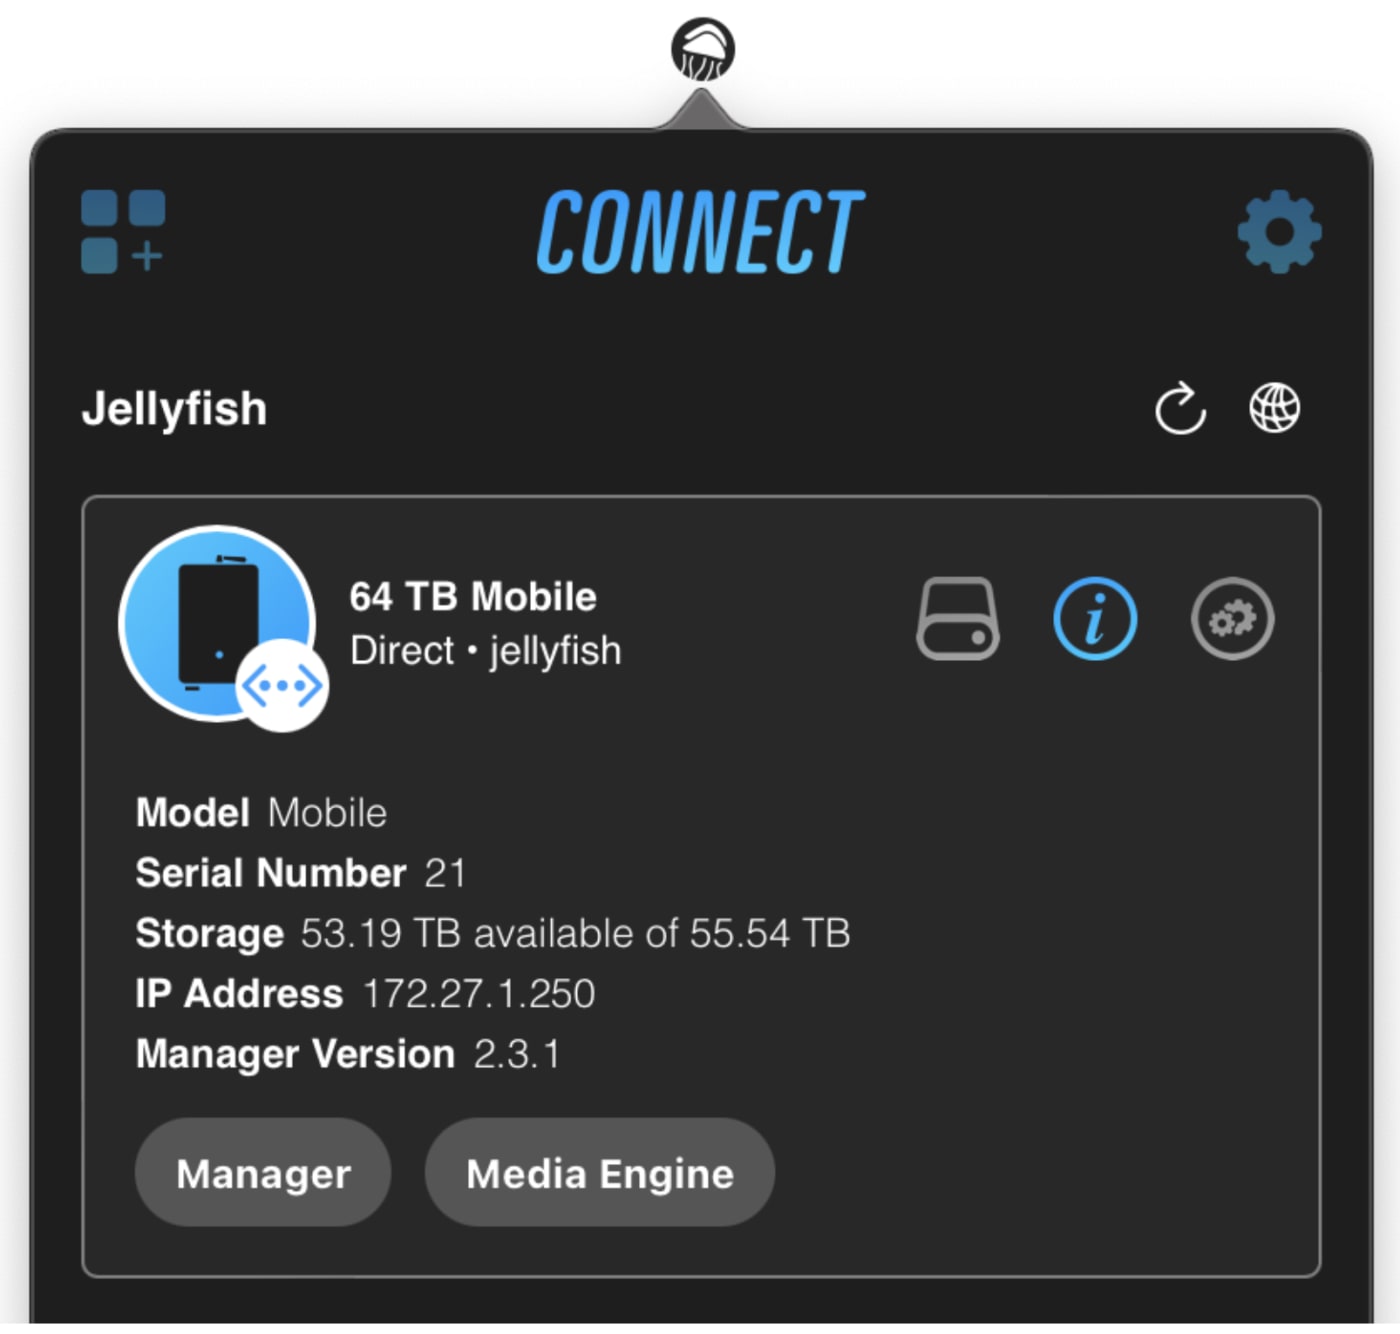
If you click on the Jellyfish shown here, it will give you information on it, including the calculated raw storage capacity, the model, the Server & Client IP’s, and the Subnet Mask.
Click on the Jellyfish connection you’d like to configure. If you’re not in an environment with other Jellyfish systems, there will only be one. Click the “Configure” button at the bottom. This will require you to authorize with your macOS password.
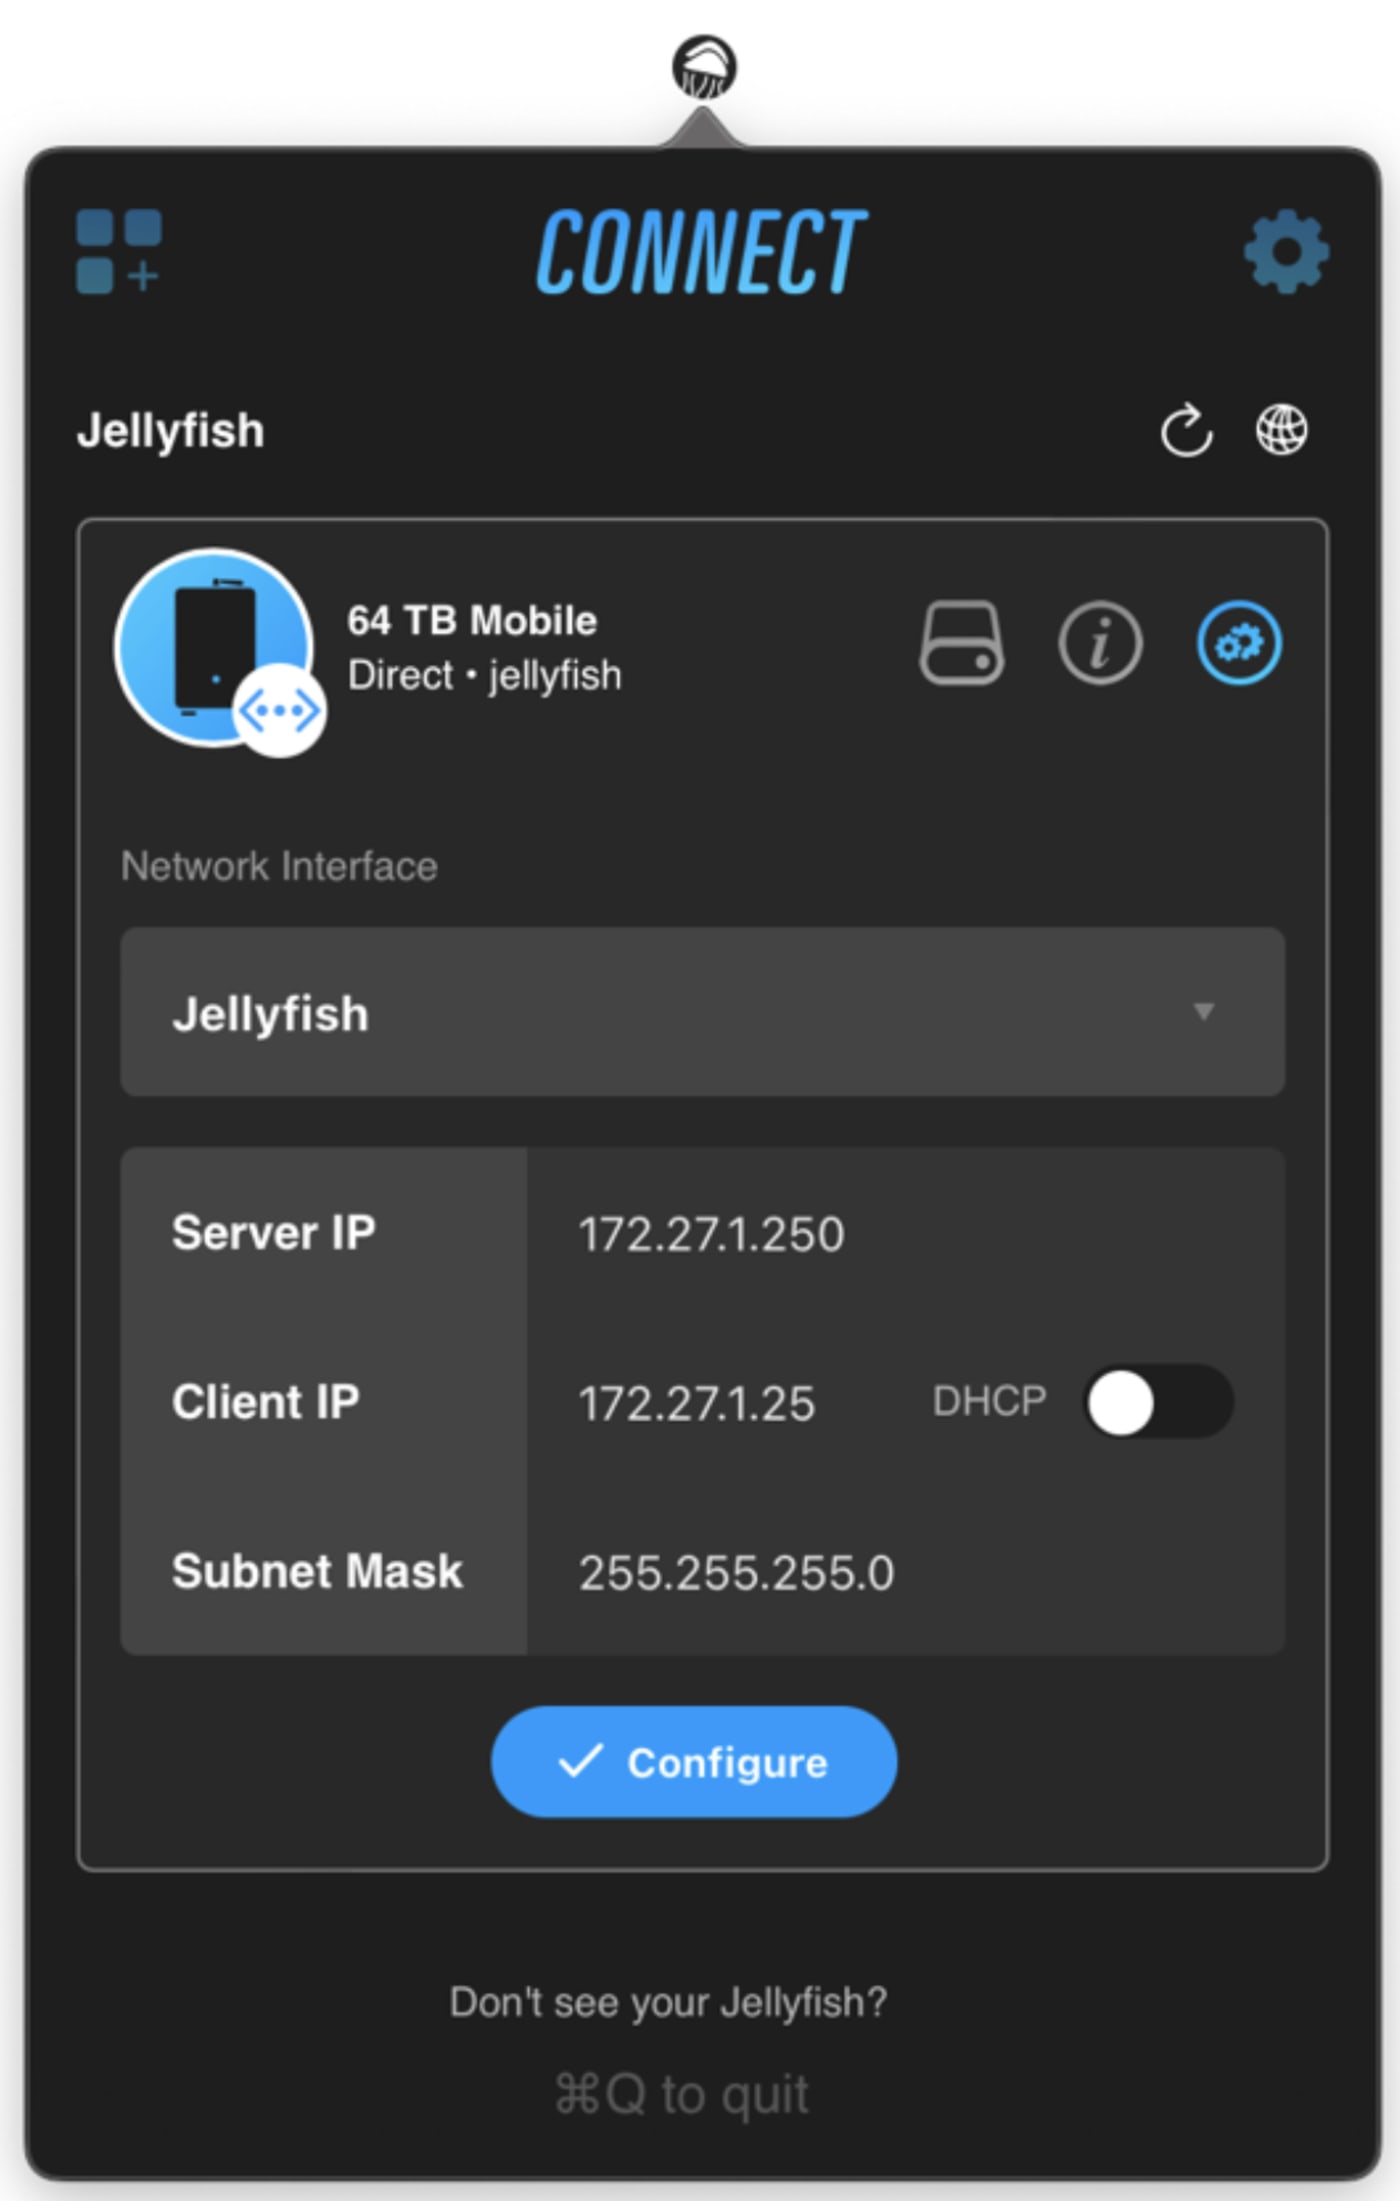
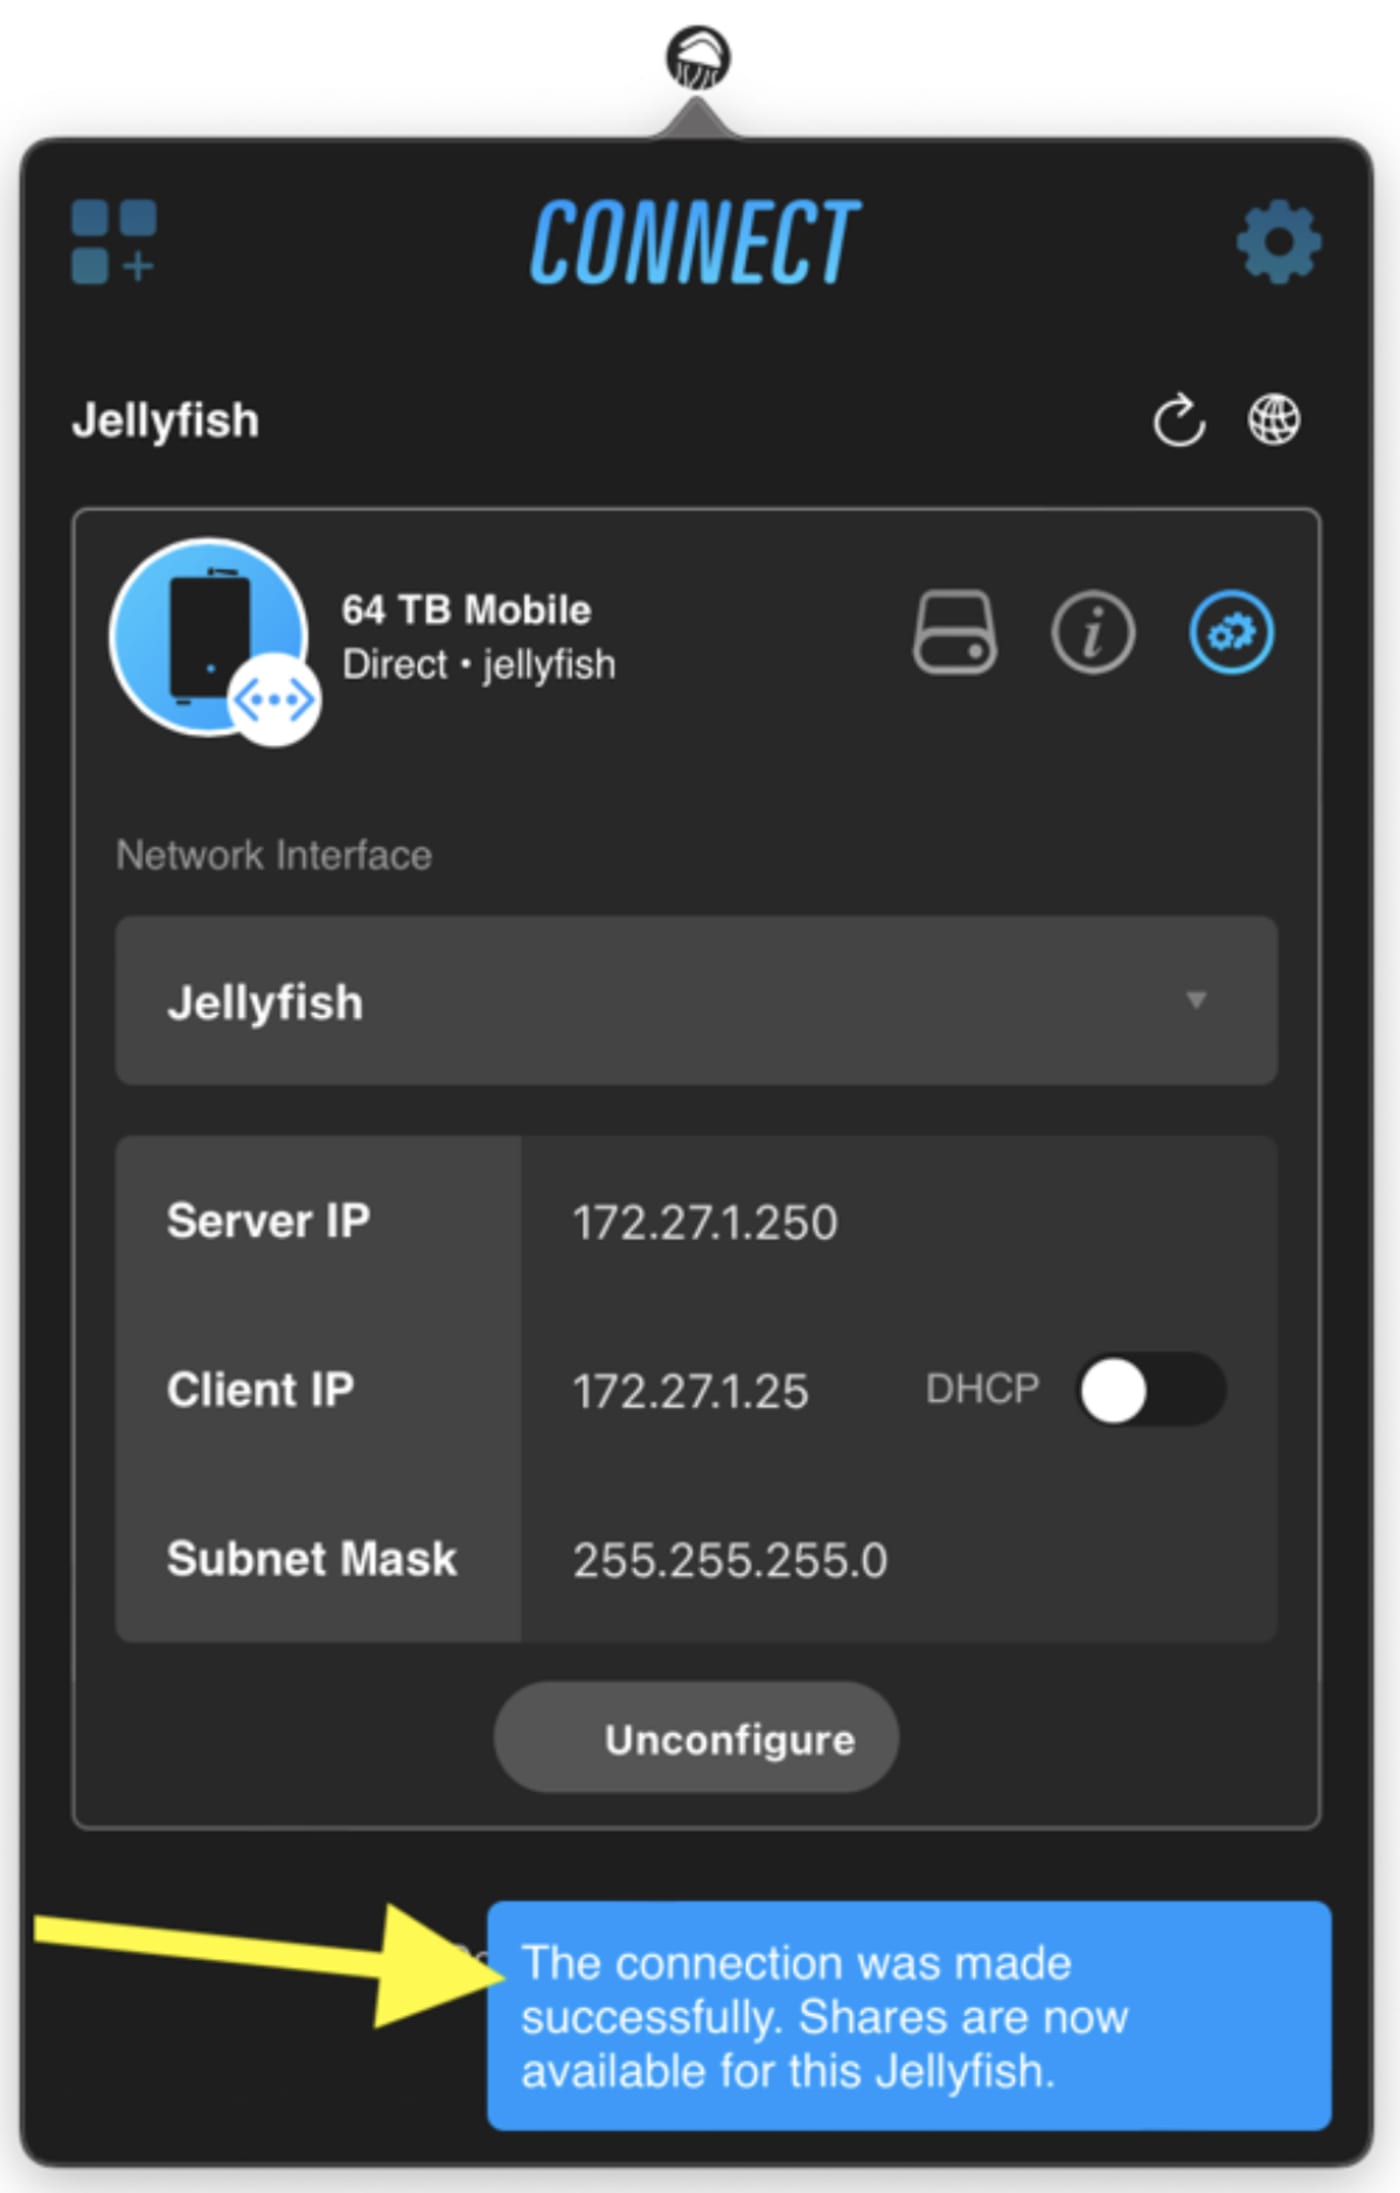
The Jellyfish will automatically select your interface and auto-fill your Server IP, Client IP and Subnet Mask. Once configuration is complete, you will see a blue confirmation at the bottom.
Now that the Jellyfish is configured, you will be prompted to login to the Jellyfish.
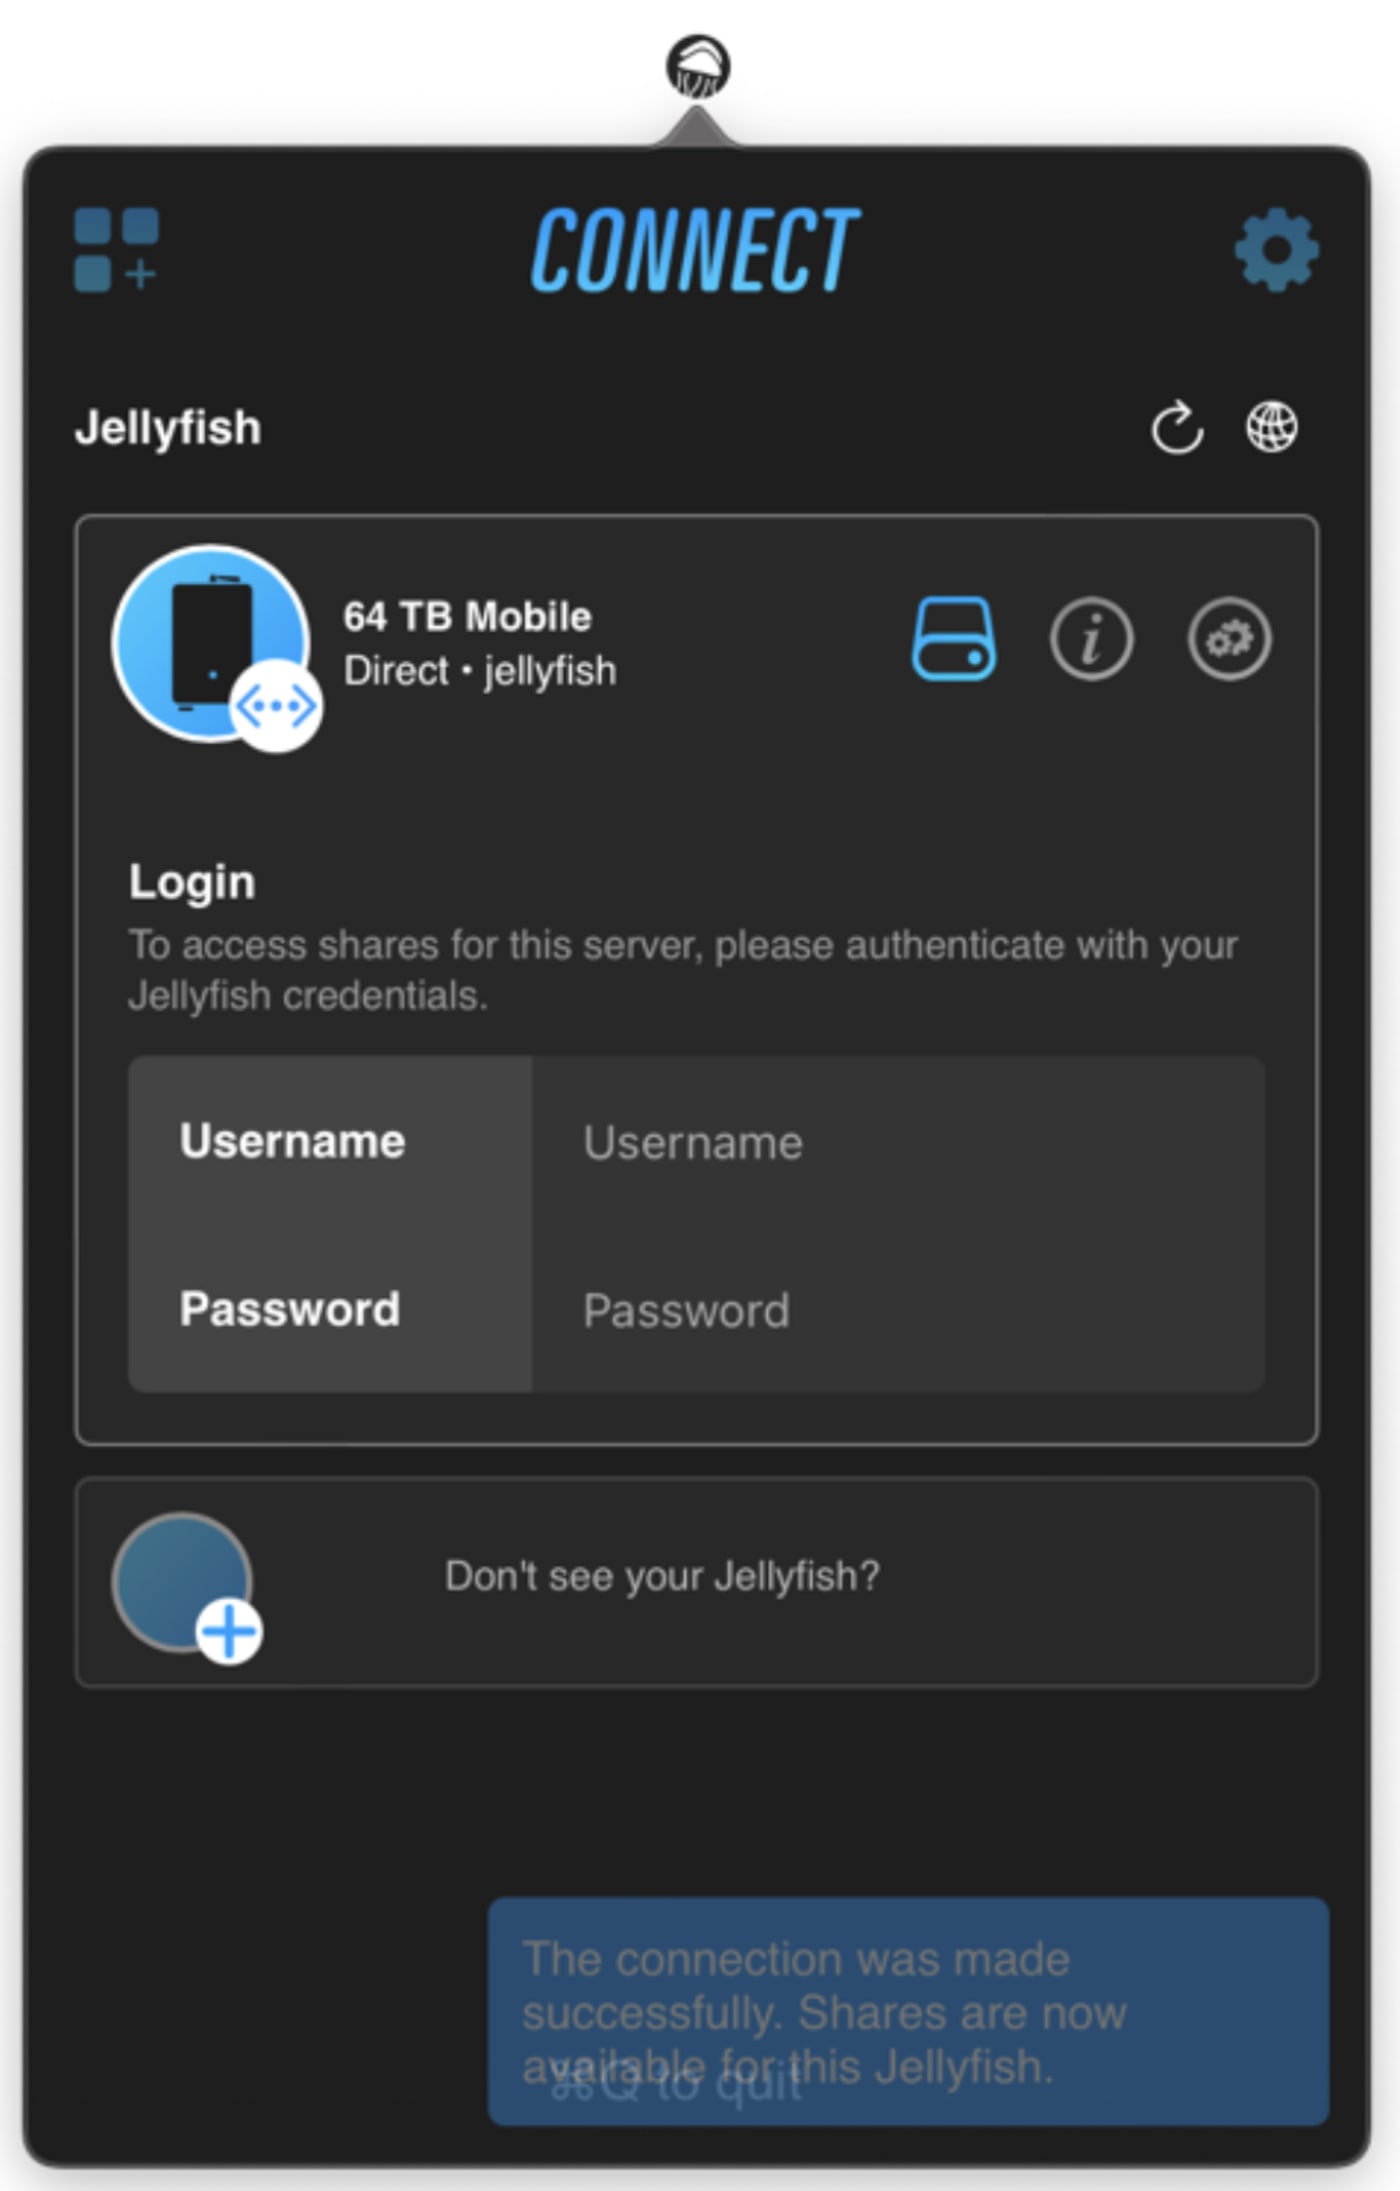
Important: OWC Jellyfish Connect 3 does not permit multiple same-user logins across multiple workstations. A same-user login on a separate workstation will disconnect the pre-existing connection.
You can create users, change passwords, and assign read/write permissions using OWC Jellyfish Manager. Click here for more information.
OWC Jellyfish Connect will now display the Shares that you have permission to access.
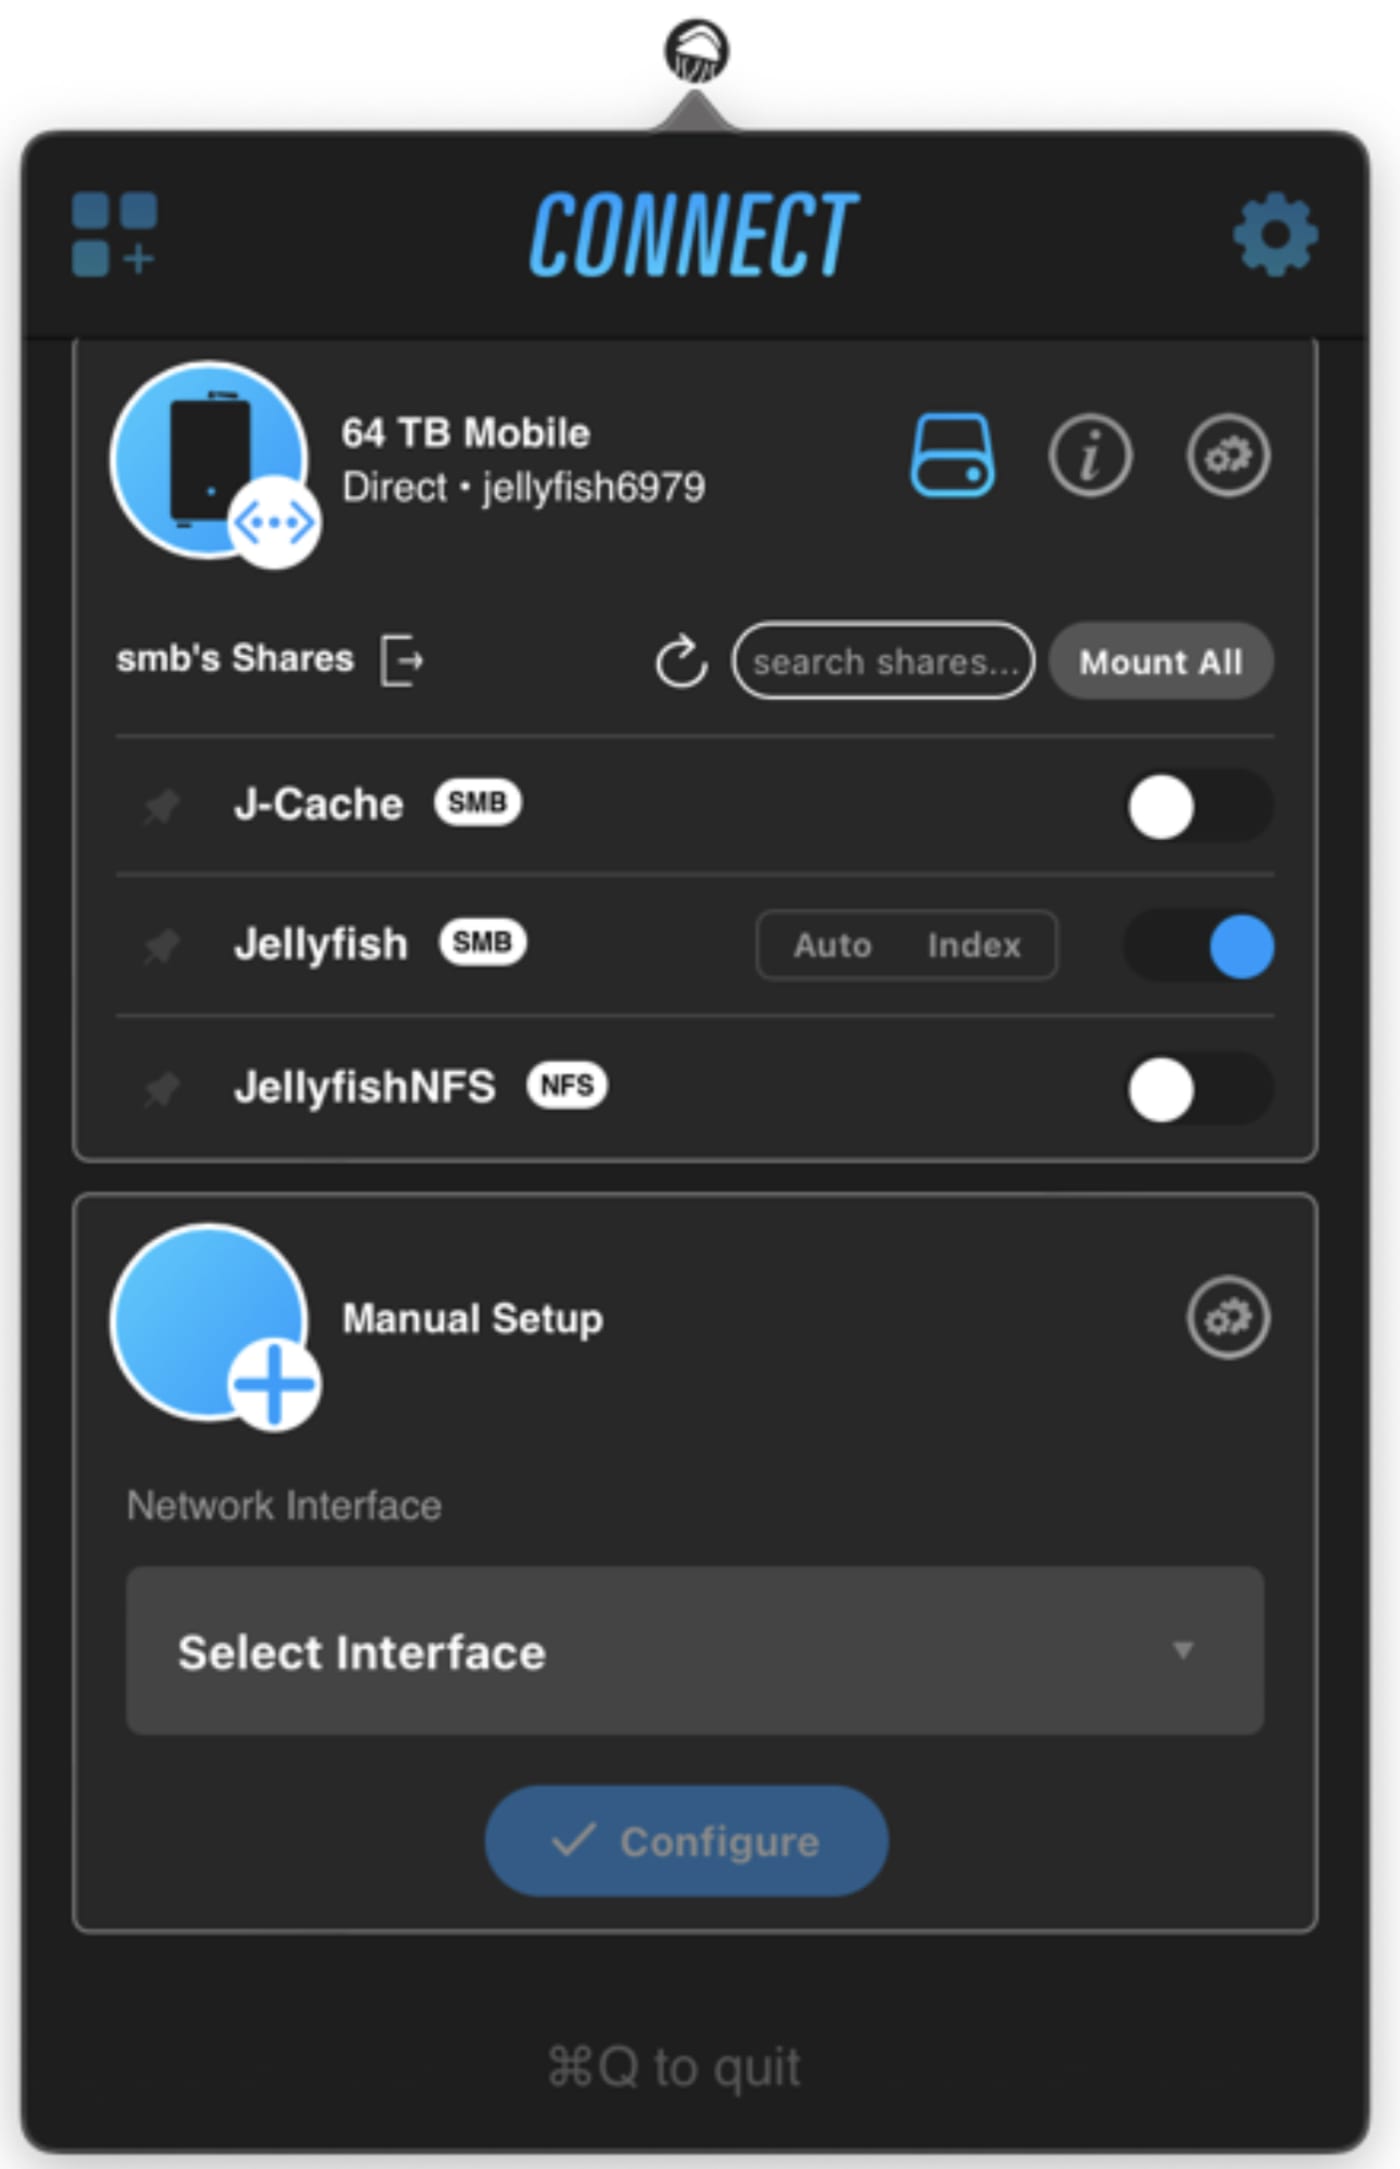
You will also see three small icons at the top right of your Jellyfish Share view.

The first is the shares tab, where you can mount or unmount your shares.
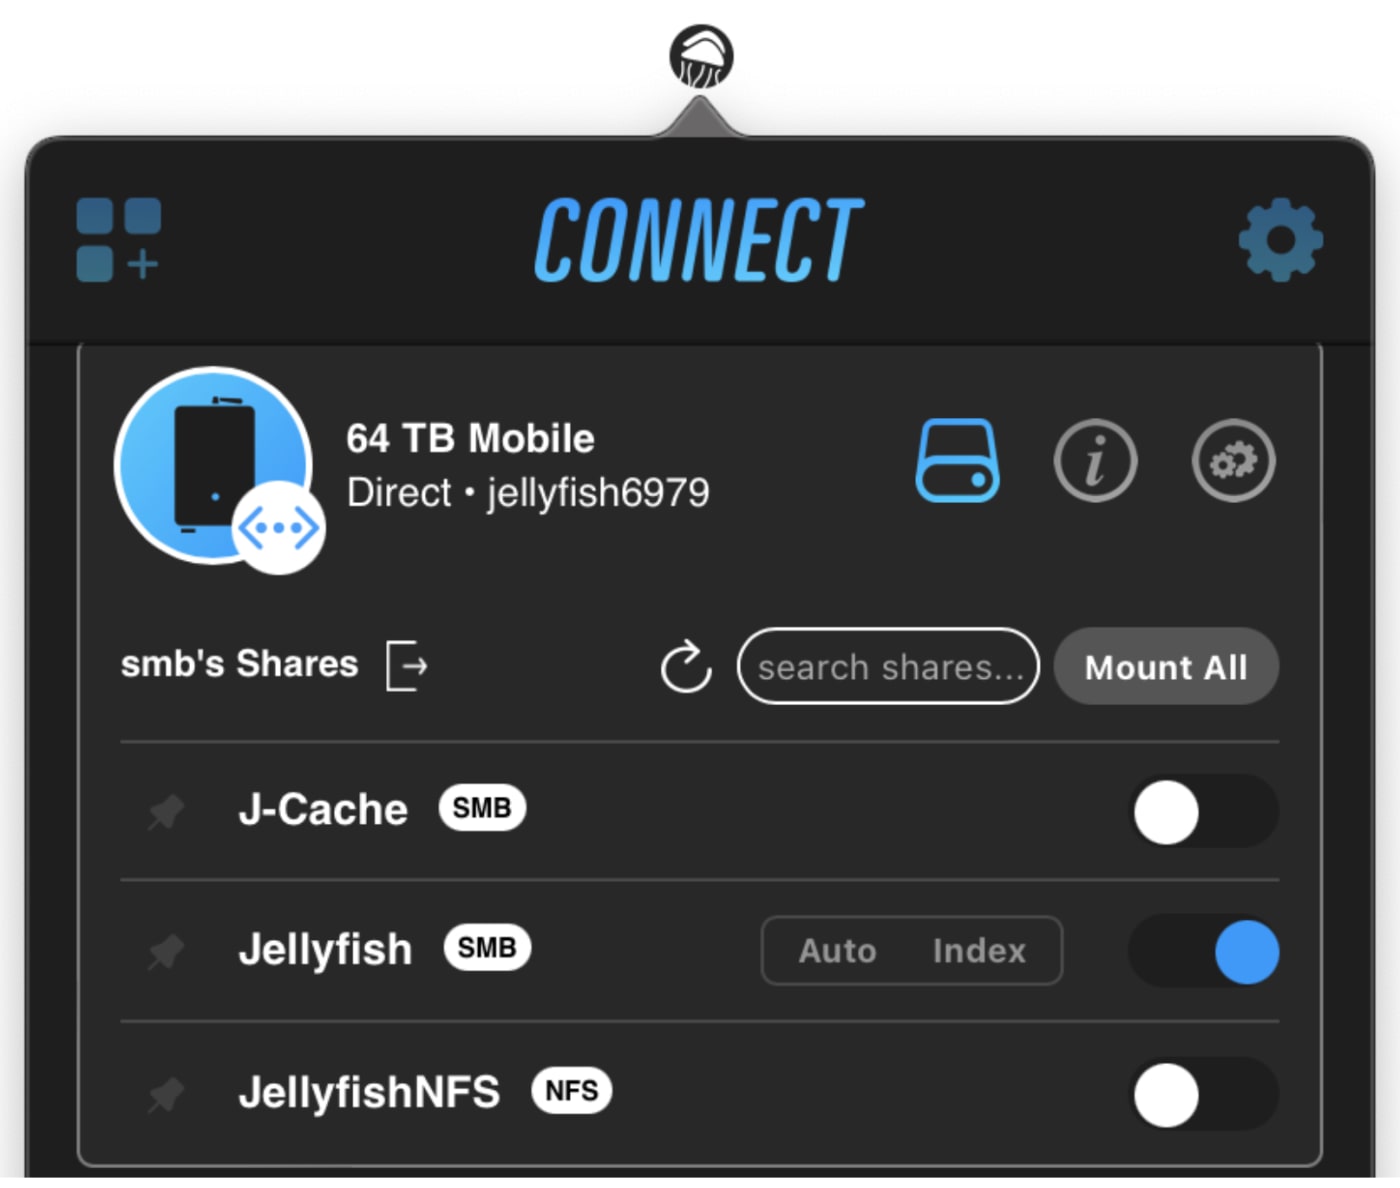
You can mount shares by clicking the toggle to the right.
Once you mount, you can click the Auto button next to your share. This will enable the share to mount automatically when you restart your Mac.
Next, the info tab will give you information on your model, serial number, raw capacity, IP address, and which version of Manager for Jellyfish you are running.
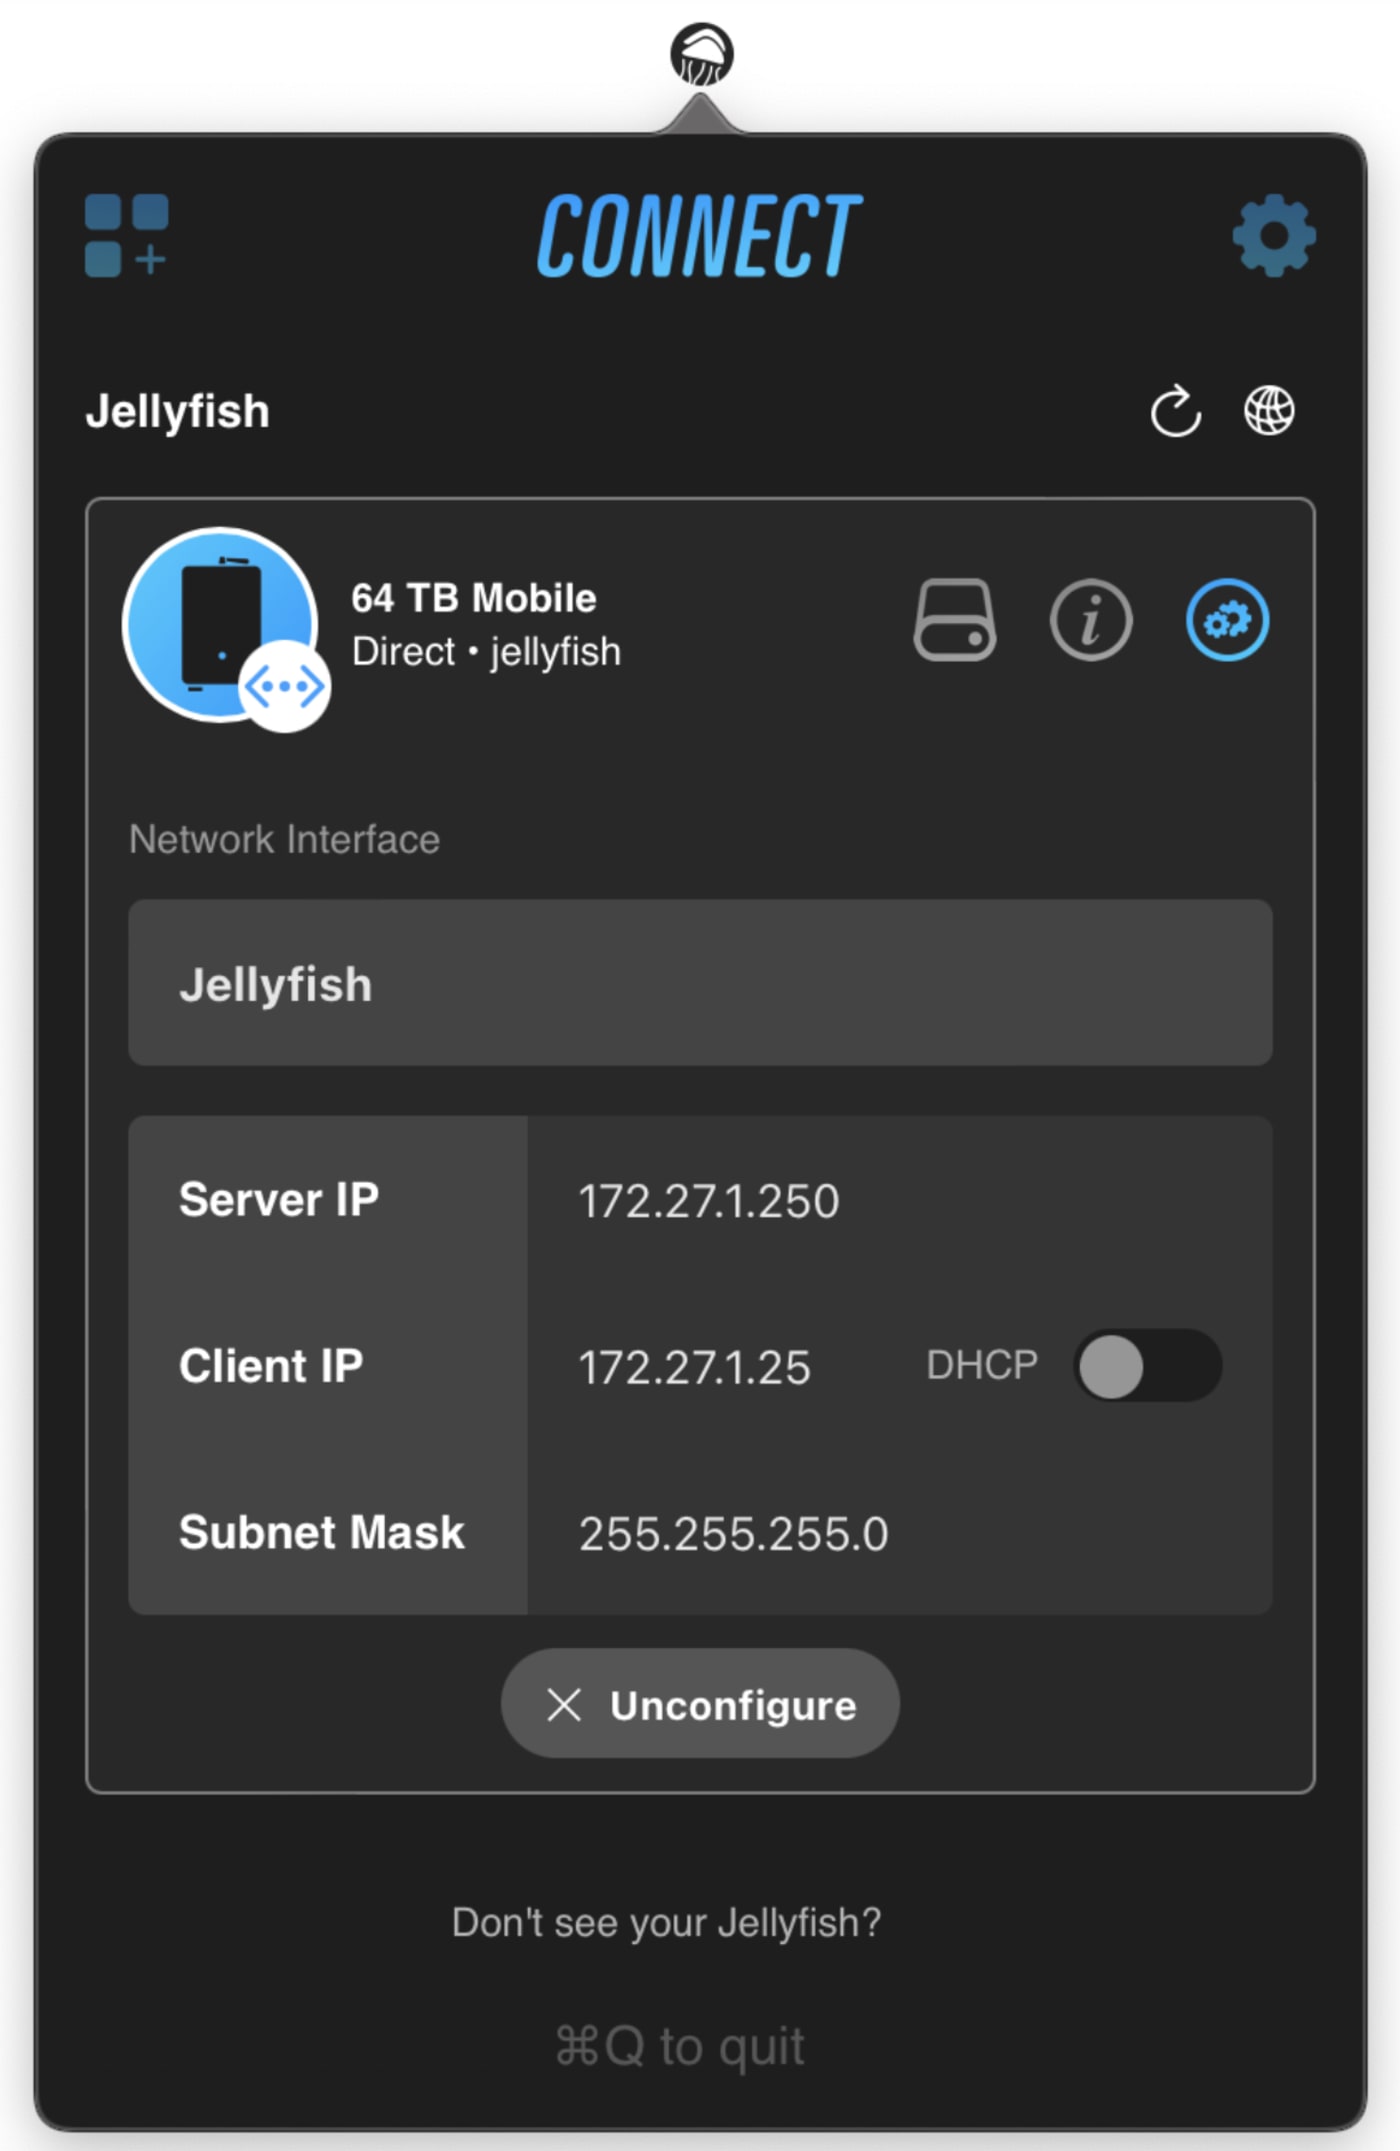
Third, the settings tab will allow you to see your connection details, such as your IP addresses, subnet mask, DHCP on/off, as well as allow you to unconfigure your Jellyfish connection altogether.
For any questions not covered by this document, please see our knowledge base at owc.com/support/jellyfish or reach out to our team.