

Connect Your OWC Jellyfish to a Switch
Learn how to connect your OWC Jellyfish to a switch for network or internet connectivity.
Maybe you’re looking to use internet-based integrations with your OWC Jellyfish, or maybe you just want to allow access to your OWC Jellyfish via your office network. Either way, we’ve got you covered. Please follow the instructions below:
Step 1: Connect one of the ports of the OWC Jellyfish to your switch. You’ll want to identify which port the switch is connected to, as this will make setup in OWC Jellyfish Manager easier. For guidance on how to do that, please check out this article: Default Port Configuration
Step 2: Log into OWC Jellyfish Manager
Step 3: Go to the Networks page.
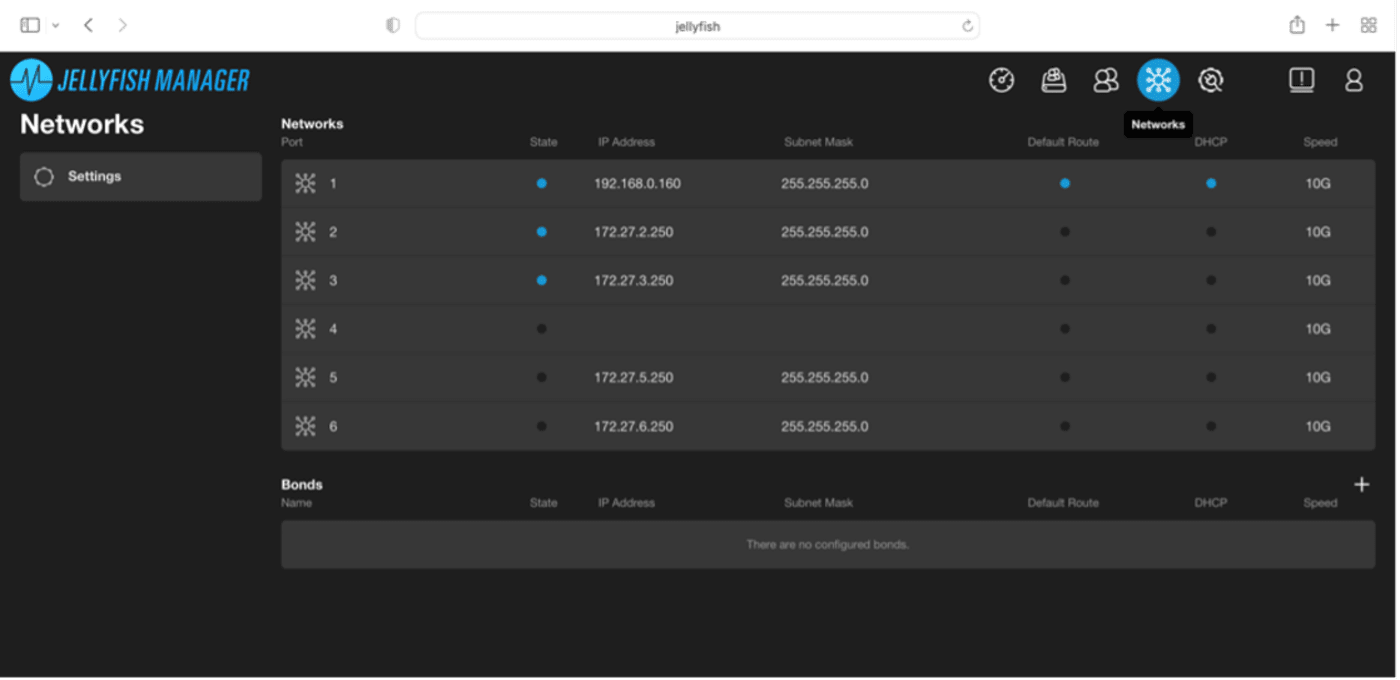
Step 4: Select the port you connected to the OWC Jellyfish (ex. port 1). Set the MTU to 1500 and toggle on the DHCP button. (If you’d rather use static IP addresses, you can manually input them in this same window.)
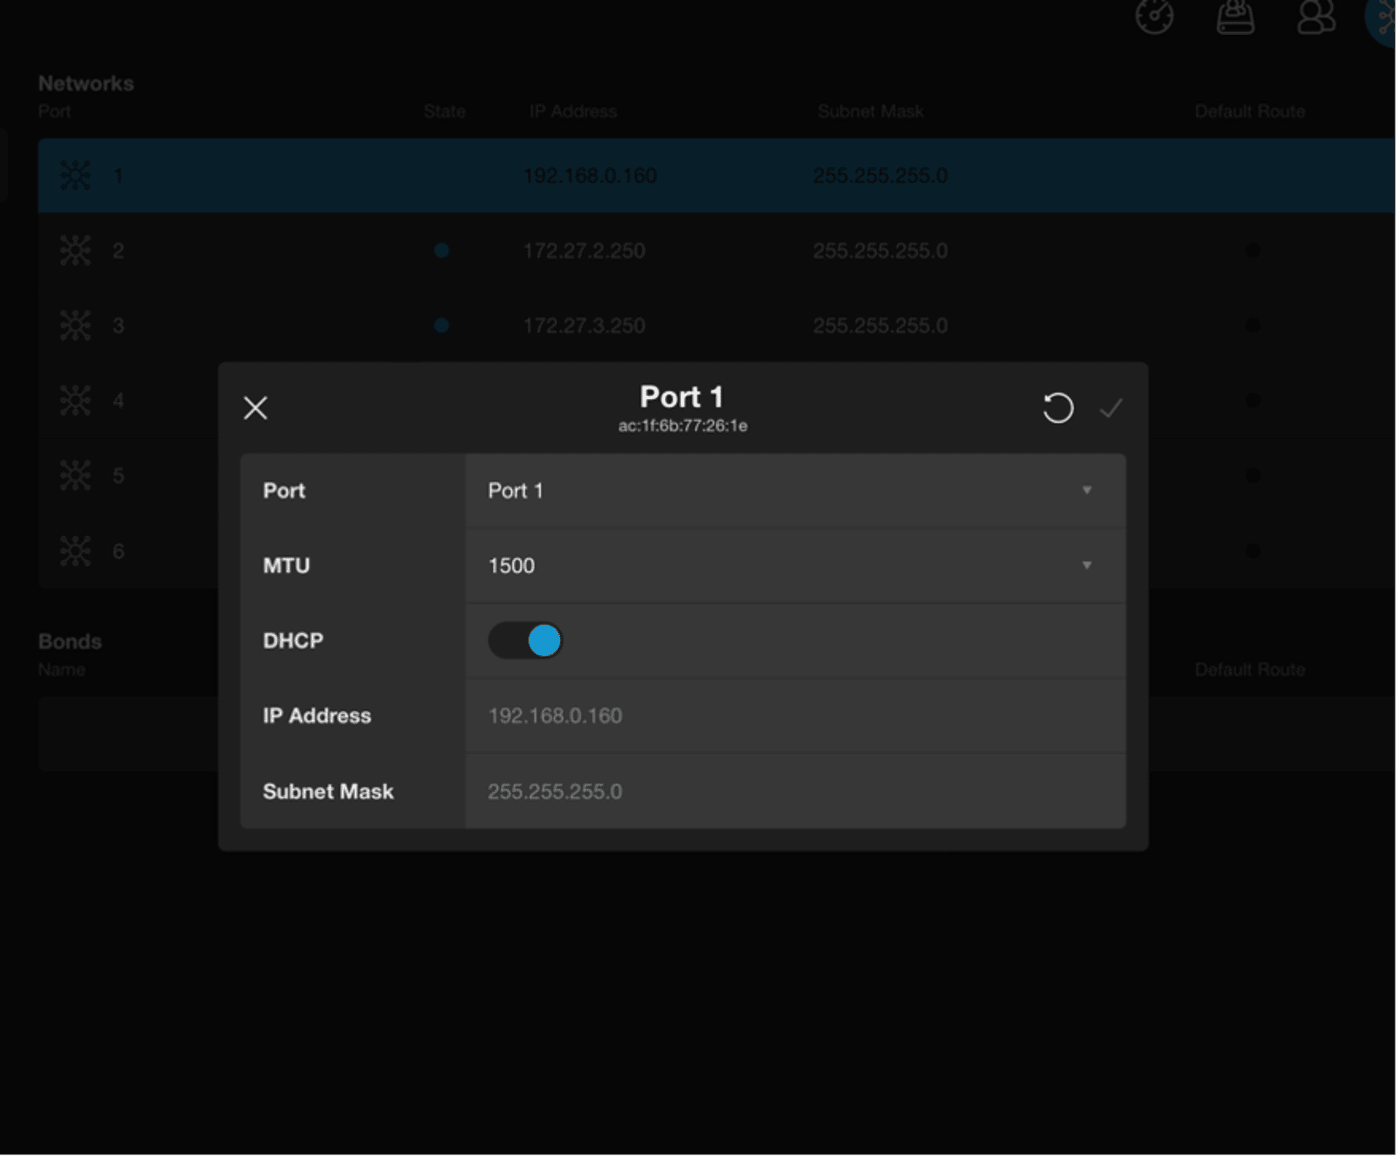
Step 5: Click the checkmark in the top right corner to save.
Step 6: Refresh the page. The OWC Jellyfish port will now have an automatically assigned IP address.
Published Date: September 22, 2022